Nov 142015
Oct 092015
qstation:
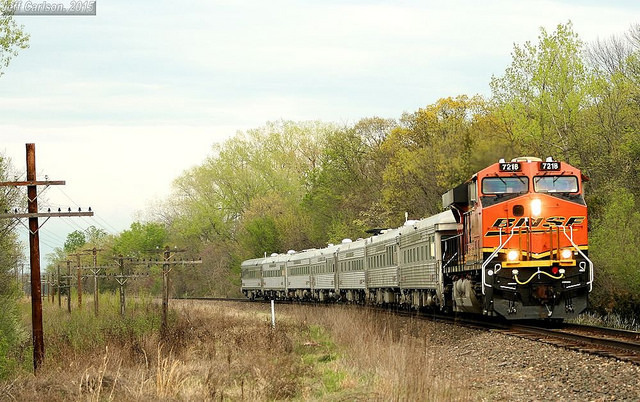
Traversing the Kaw River Valley by Jeff Carlson_82 on Flickr.
Thanks to a timely heads up from MILW_E70, combined with nice(ish) weather and a free Friday night, I was able to get out tonight and photograph the BNSF #7218 heading up the O-GLSTOP on the homestretch of its journey.
After passing over the detector about half a mile to the east of here, the 7218 passes mp41 on the Topeka Sub, just a few miles west of Lecompton, KS.
Jan 052014
We build NMRA turnouts in HO and S scales.
HO scale code 55 #5 RH,LH, double and single crossovers.
HO scale code 70 #8 RH,LH, double and single crossovers.
HO scale code 83 #5, #6, #8 RH,LH ,double and single crossovers.
S scale code 83 #5, #6, #7, #8 RH, and LH.
Also HO scale code 55 curves 22″, 24″ and 30″ radius.
Straight track in 36″ lengths HO scale code 55, HO scale code 70, HO scale code 83, S scale code 83.
Appropriate white pine tie kits included with every turnout and section track order.
Dec 042013
Nov 252013
Howard Street Tunnel

Howard Street Tunnel
Nov 222013
Have worked on a drawing using West Chandler

and a version of Pratt Street Railroad, (MR May 1954)
into an two shelf S scale layout in 12 x 15 foot room plus closet. That works out to about 20 feet for the long shelf.
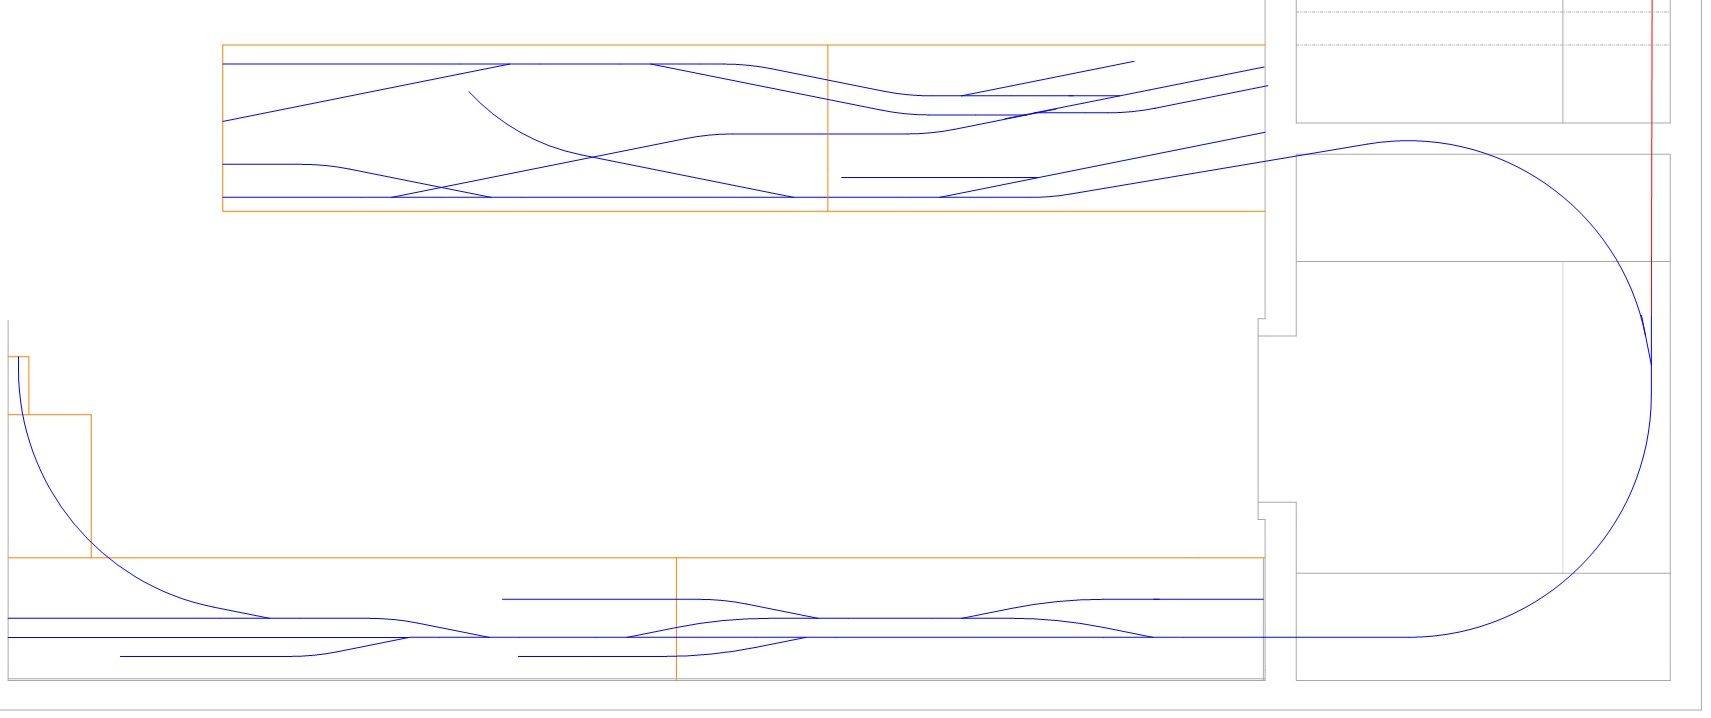
Will be using number fives including a lapped turnout suggested in the MR article. ME code 83 rail hand laid on stained pine ties.
Building aides: Fast Track turnout fixtures, filling jigs, and sweep sticks. Tie spacing fixture. Track gauge.
I moved the turnouts a bit from where they were in MR so that I can make better looking crossings. In that I can use one of the rail jigs to setup the crossings.
Had planned to have the traverser in this same room, but its approach eats up the adjacent bedroom’s closet space. So it will get moved to another room on the red line.
Nov 032013
first S scale #5 code 83 lapped turnouts.
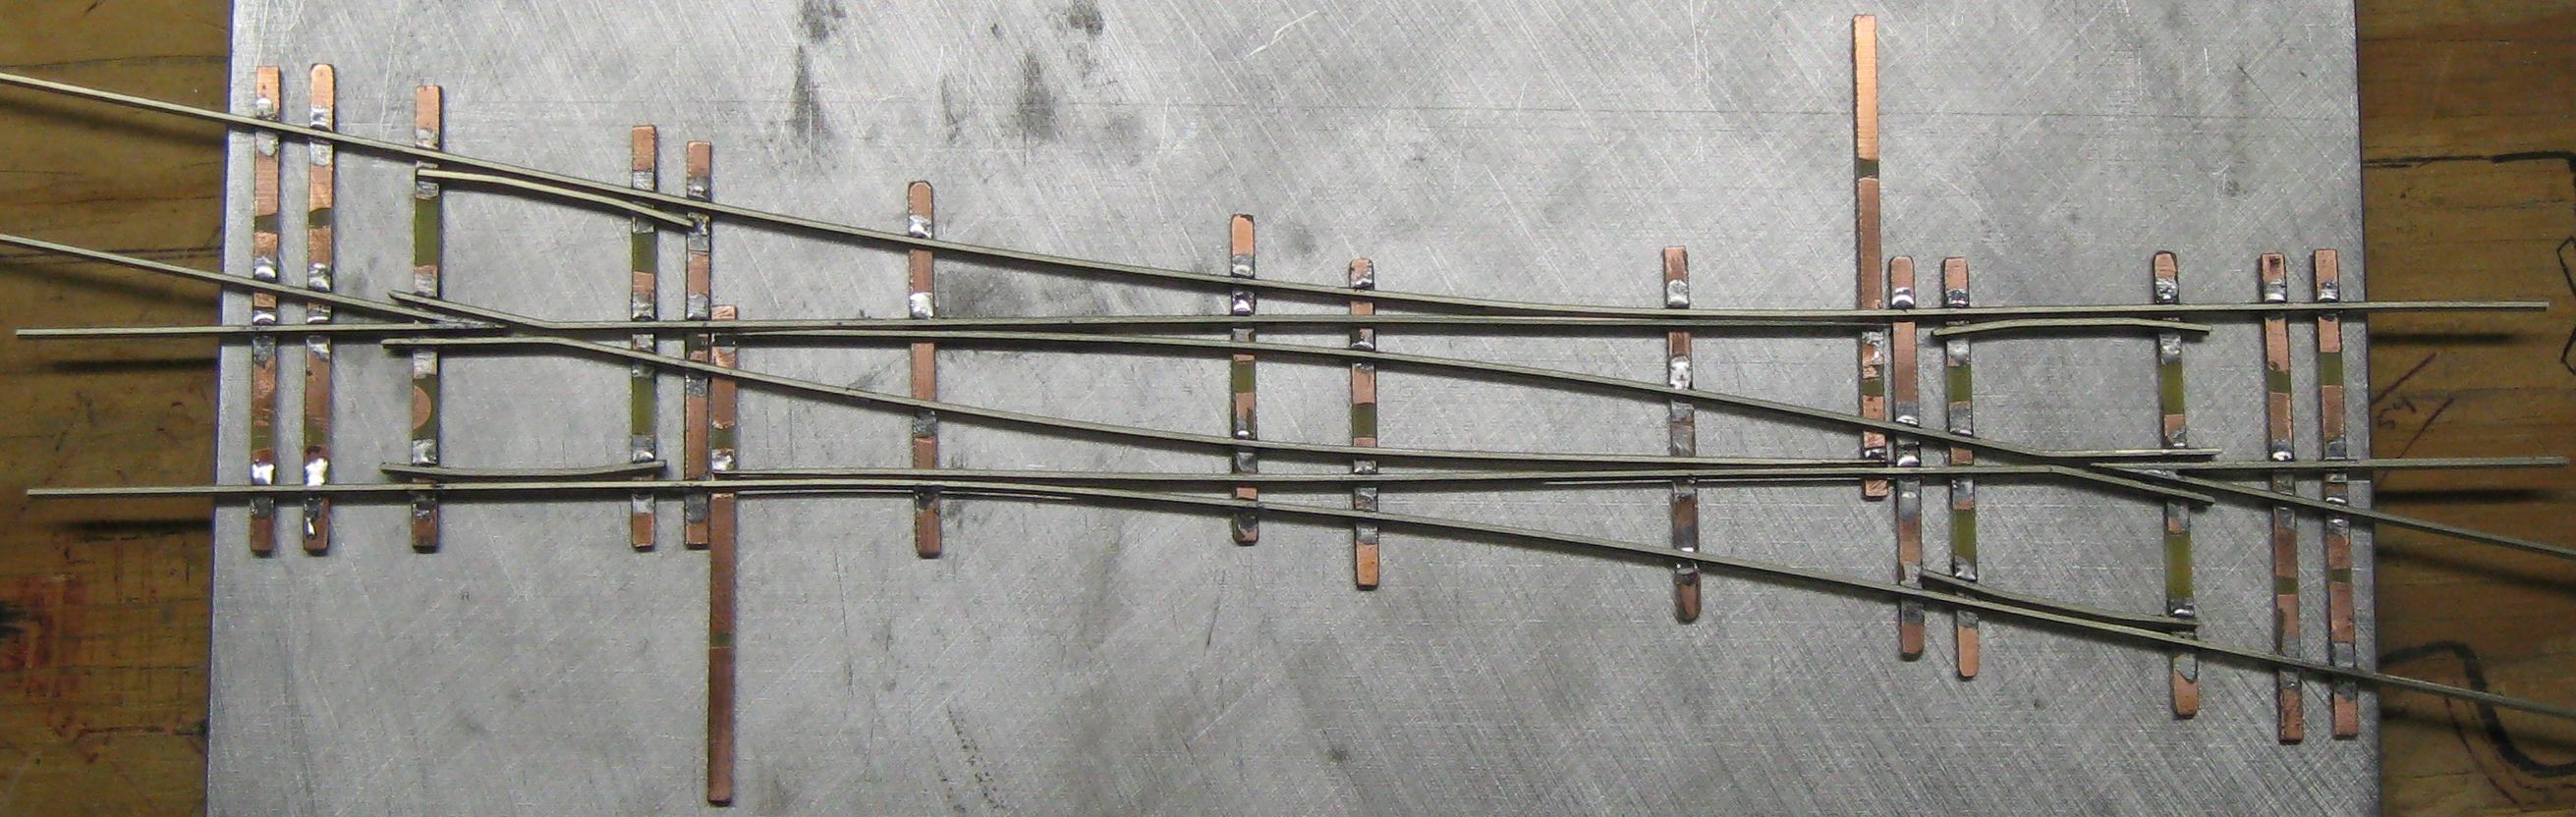
Lapped S scale code 83 #5 turnouts
Still need to clean up the solder joints. Hinge the points, cut gaps in the rail, add drops, paint, and glue on stained ties.
Oct 202013
Acquired a new to me S scale SW9/1200. Adding a dcc mobile decoder. Made this graphic long ago and posted it. Somewhere in the shuffle though the years lost it. But here it is again.
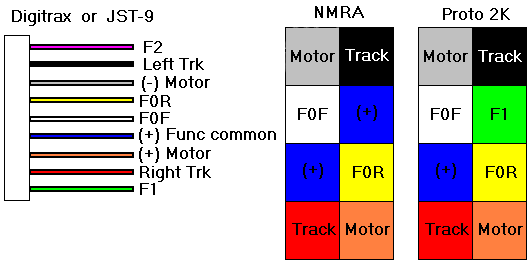
DCC 8 pin and 9 pin JST
Sep 232013
Got one now. Yet to use it. Haven’t built any turnouts in a while. Primarily I use a saw like this for cutting gaps.
Sep 182013
Useful tool. Just wish it set up quicker and didn’t stink for days.
Pliobond Industrial Contact Cement
From reviews, this stuff had great promise. In my opinion I’ll use some other adhesive. For bonding painting rail to stained ties, I prefer CA. I usually use the bottle with purple label. Available in many hobby shops as their house brand.
Sep 162013
Aug 262013
“Arduino Pins”
Using Adafruit Motor/Stepper/Servo Shield
pins: 3,4,5,6,7,8,11,12
LCD Shield Kit w/ 16×2 Character Display
pins: 18,19
Arduino moves feed fence to cut multiple pcb ties.
Settings will be available for the various lengths needed for turnout and track construction.
Tie widths for HO & S standard gauge.
Everything can be adjusted.
Advance key may/will get the most exercise so a beefier switch will be in order.
Tasks:
Devise Menu / control scheme for LCD Shield:
Up / Down – scroll through menu items.
Right / Left – navigate branches
Select
Once Item is Selected Right Key advances feed fence selected amount.
Left key press and release moves feed fence back (to the left) selected amount.
Left key held for 3 seconds moves feed fence to left most position (load).
Top Menu
HO
S
For each:
Make ties (set for width cut for that scale)
Stock (selections for cutting stock to length)
(Once stock is cut to length is gets ‘The Sharpie Treatment’ and a ‘Green Bath’.)
8.5′
9′
9.5′
12.5′
14′
15′
23′
This is for a #8. Its likely similar for the others.
( I cleaned up and now I can’t find anything. )
Throw Bar
Measurements: Ties slots in Fixtures.
Calibrate “Machine” to duplicate measurements.
Put ‘table’ on legs. – done
Mount feed fence slides.
Mount feed fence uprights. – done
Mount stepper and feed screw.